How to Check Whether Your Laptop Supports an SSD Upgrade
Confirm SSD upgrade compatibility before buying: identify your exact laptop, storage interface, M.2 size, spare slot, migration plan, and service limits.
An SSD upgrade is worth considering only after you confirm that your specific laptop can accept the drive you plan to buy. The safe approach is not to shop by brand, screen size, or an M.2 label alone. Find the exact machine type or SKU, check its official documentation, and match the replacement drive’s interface and dimensions to that documentation.
The key distinction is simple: M.2 describes a physical card format, not a complete compatibility standard. An M.2-shaped slot may support PCIe/NVMe storage, SATA storage, both in some designs, or something other than a standard storage upgrade. It may also be occupied, inaccessible, or absent in another configuration of the same laptop family.
Before ordering an SSD, confirm whether you are replacing the existing drive or adding a second one, whether the laptop supports that drive type and length, and how you will preserve or reinstall your operating system.
Start with the exact laptop model and installed drive
Do not begin with a retailer listing or a generic “works with” tool. Laptop families often include several regional configurations, motherboard revisions, processor options, and storage layouts under nearly identical product names.
Record these details first:
- The full laptop model or machine type, including any suffix after the main model name.
- The serial number, if the manufacturer’s support site requires it to show the correct documentation.
- Your operating system version.
- The installed storage drive’s model number and capacity.
- Whether the existing drive is the boot drive.
- Whether device encryption is enabled.
On Windows, you can usually find the system model in Settings > System > About or by searching for System Information. The installed drive model may appear in Device Manager under Disk drives, in a manufacturer utility, or in the firmware setup screen.
On other operating systems, use the system-information tools available for that platform. The goal is not to infer compatibility from the current drive alone. It is to create an accurate record you can compare with the laptop’s official support material.
Then find the manufacturer’s support page for the exact model. Look for documents with names such as:
- Service manual
- Hardware maintenance manual
- Owner’s manual
- Parts catalog or parts lookup
- Product specifications
- Storage support matrix
- Setup or BIOS/UEFI guide
If the support page identifies multiple sub-models, do not assume their storage arrangements match. Use the serial number or machine type when the site offers that option.
Your pre-purchase record
Before buying anything, write down the answers to these questions:
| Check | What you need to know |
|---|---|
| Exact laptop identity | Full model, SKU, machine type, or serial-number-specific configuration |
| Current storage | Drive model, capacity, and whether it is removable |
| Upgrade goal | Add a second drive, replace the boot drive, or increase capacity only |
| Supported storage type | M.2 NVMe/PCIe, M.2 SATA, 2.5-inch SATA, proprietary module, or integrated storage |
| Physical fit | Accepted drive length, mounting point, clearance, bracket, shield, and screw requirements |
| Software plan | Clone, restore from backup, or reinstall the operating system |
| Service limits | Warranty terms, safe disassembly procedure, and battery-handling instructions |
If you cannot fill in the storage type and physical-fit rows from official documentation, pause before ordering a drive.
Confirm that the storage is replaceable and whether a spare slot exists
There are three very different upgrade situations:
- Replacing a removable internal SSD. The laptop has one removable drive, and the new SSD will take its place.
- Adding a second internal SSD. The laptop has an unused compatible slot and the required mounting hardware.
- No practical internal upgrade. Storage may be soldered to the board, use a proprietary module, or be inaccessible without procedures not supported for customer service.
A laptop can have an M.2 drive installed without having a second M.2 slot. Conversely, an unused-looking connector is not proof that it accepts an SSD. The service manual, board diagram, and official parts list should establish both the number of storage connectors and their intended use.
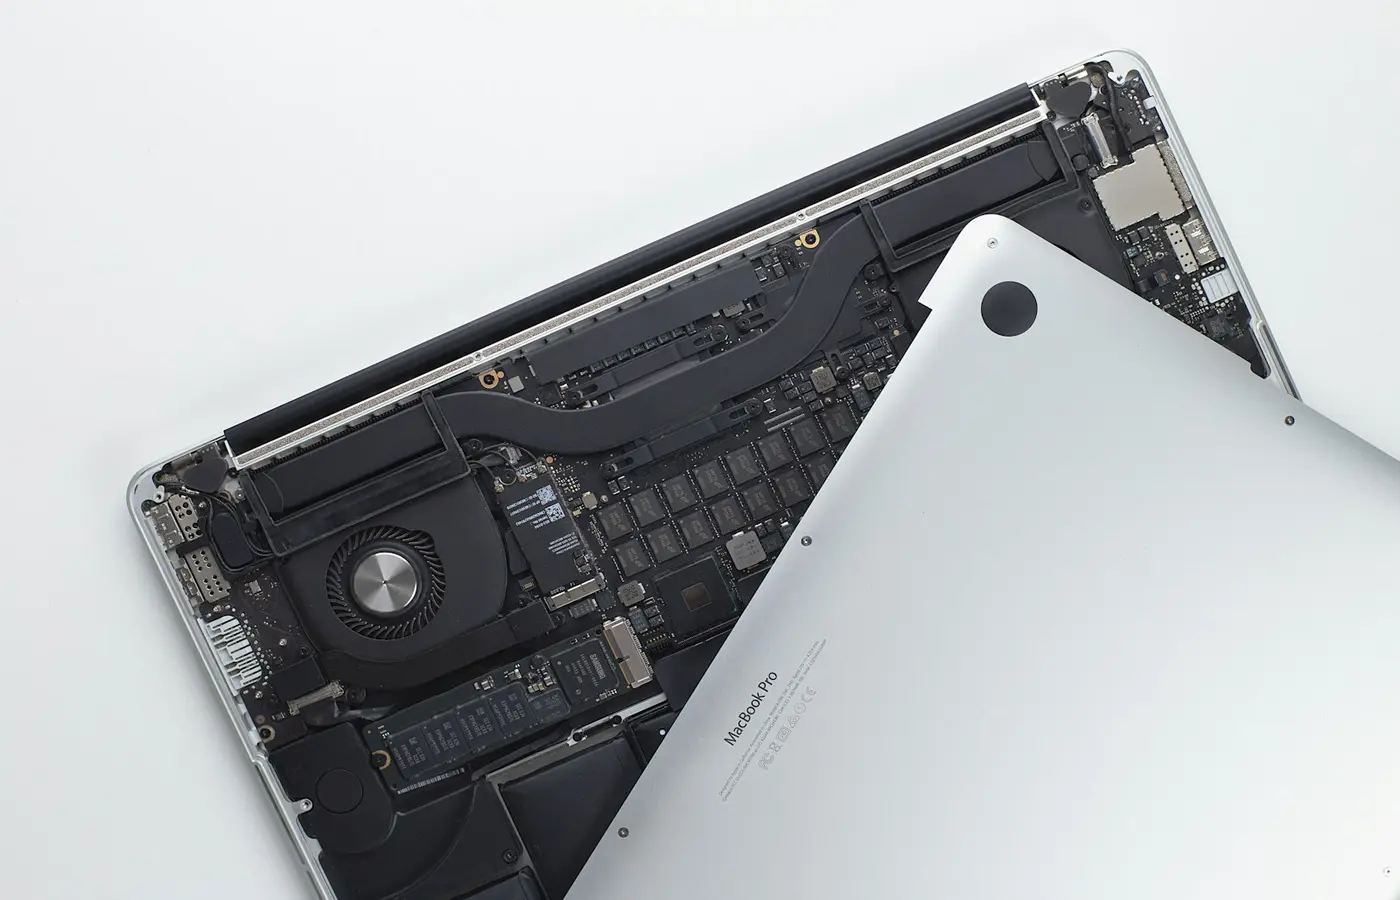
Look specifically for diagrams that show:
- An existing SSD and its retaining screw.
- A second SSD connector or labeled storage bay.
- Different standoff positions for different M.2 lengths.
- Required brackets, cables, shields, or thermal pads.
- A battery-disconnection step before storage removal.
Do not treat an empty physical space as an available expansion bay. Some chassis are shared across configurations, and a bay may lack the connector, cable, mounting bracket, or firmware support needed for an upgrade.
If the documentation and your laptop do not match—for example, the manual shows a connector that is not present—contact the manufacturer with the serial number or use an authorized service provider before buying parts.
Match the drive type: M.2 is not a compatibility answer
Most laptop SSD upgrades involve one of these categories:
- M.2 PCIe/NVMe SSD: A compact M.2 card using PCIe communication and the NVMe protocol.
- M.2 SATA SSD: A compact M.2 card using the SATA interface.
- 2.5-inch SATA SSD: A larger drive installed in a dedicated bay with a cable or connector assembly.
- Proprietary or integrated storage: A design that should not be treated as a standard consumer SSD upgrade without model-specific confirmation.
As a general explanation, M.2 refers to the physical module and connector format rather than guaranteeing a specific storage protocol. The distinction between M.2 SATA and M.2 NVMe is therefore essential when checking a laptop’s specifications. This compatibility overview explains the same basic distinction, but your laptop manufacturer’s documentation should be the final authority.
Do not rely on any one of these as final proof of compatibility:
- The notch pattern on the installed SSD.
- The fact that another version of the laptop has an NVMe drive.
- A retailer’s broad compatibility filter.
- The presence of an M.2-shaped connector.
- The interface used by the currently installed drive.
Those details can help you ask better questions, but only the exact laptop documentation can establish what replacement drives the system supports.
For example, a laptop that currently contains an M.2 SATA SSD does not automatically accept an NVMe SSD. Its slot may support SATA only. A laptop with an NVMe SSD may also have restrictions involving drive dimensions, firmware, cooling hardware, or the second slot’s capabilities.
Verify drive length, clearance, PCIe generation, and capacity support
Once you know the supported storage interface, verify the drive’s physical and electrical requirements.
Check the M.2 dimensions
M.2 drive names commonly include a size code such as 2230, 2242, or 2280. The first two digits represent the width in millimeters; the remaining digits represent the length. For example, a 2280 drive is 22 mm wide and 80 mm long.
Do not assume that a longer drive will fit because it is a common retail size. Check the service manual for:
- Supported M.2 lengths.
- The location of the retaining-screw standoff.
- Whether a bracket or carrier is required.
- Whether the laptop accommodates a single-sided or double-sided drive, if documented.
- Whether a factory-installed shield, pad, or cover must be reused.
Compare those requirements with the candidate SSD’s manufacturer datasheet. In particular, check the drive’s exact length and whether any included heatsink changes its height. A desktop-style heatsink is often physically unsuitable for a thin laptop unless the laptop documentation explicitly allows it.
Check PCIe generation and lanes—but do not overpromise compatibility
Laptop specifications may state a PCIe generation, lane count, or supported NVMe configuration. Record what the manufacturer actually says rather than assuming the newest SSD is automatically the best choice.
A newer PCIe SSD may operate differently in an older system than in its advertised maximum configuration. Even where components are designed with cross-generation operation in mind, a specific laptop can still have physical-clearance, firmware, power, thermal, or capacity constraints. The correct question is not simply, “Will this Gen4 drive work in a Gen3 laptop?” It is, “Does the manufacturer document support for this type, size, and implementation of drive in this exact laptop?”
If the laptop manual lists only a particular generation or approved drive family, follow that guidance. If it gives no capacity limit, do not infer that every capacity is supported. Check the parts catalog, firmware documentation, or manufacturer support channel for clarification.
Check the small parts
Before opening the laptop, confirm that you have:
- The correct SSD.
- The correct mounting screw or bracket, if the manual indicates one is needed.
- Any approved thermal pad, shield, or carrier required by the laptop.
- The tools specified by the service manual.
- A safe place to keep screws in their original locations.
- A verified backup and recovery method.
Do not substitute an unknown screw. A screw that is too long can damage a board or chassis; one that is too short may not secure the drive correctly.
Decide whether to add storage, clone the old drive, or reinstall the operating system
Your migration plan depends on whether the new SSD is additional storage or a replacement boot drive.
Adding a second SSD
If the laptop has a confirmed spare compatible slot, installation may be simpler because the original boot drive can remain in place. After installation, verify that the firmware detects the new drive, then initialize and format it through your operating system’s disk-management tools if needed.
Do not initialize the wrong disk. Before making partition changes, identify each drive by its model and capacity.
Replacing the existing boot SSD
You generally have two routes:
- Clone the old drive to the new one before installation.
- Perform a clean operating-system installation and restore files from a backup.
Cloning can be practical, but it is not universal. Check the cloning tool’s requirements for your operating system, source and target interfaces, encryption state, licensing, and available storage. An external enclosure or adapter must support the specific drive type; an enclosure designed for NVMe is not automatically appropriate for an M.2 SATA drive, and vice versa.
A clean installation avoids copying some old software problems, but it requires recovery media, account access, application installers, and a backup of your files. Whichever route you choose, create recovery or installation media before removing the old boot drive.
Back up before changing partitions or hardware
A backup is not complete merely because it exists. Confirm that you can access the backup and that it includes the files you need. If you rely on encryption, make sure you can access the recovery key before changing the boot drive or firmware settings.
After installing a replacement SSD, first check whether the firmware setup screen detects it. If it does not, stop rather than repeatedly forcing the connector or attempting software fixes. Recheck the drive type, seating, mounting position, and the laptop’s official procedure.
Check warranty terms and know when to stop
Opening a laptop does not have one universal warranty outcome. Policies vary by manufacturer, country or region, product line, and whether damage occurred during the work. Check the current warranty terms that apply to your laptop and your market, along with any customer-replaceable-unit policy.
Use the official service manual as the installation procedure. It should control the order of disassembly, screw removal, battery handling, storage access, and reassembly.
At a minimum, follow these precautions:
- Shut down the laptop fully rather than leaving it in sleep mode.
- Disconnect external power and accessories.
- Follow the manual’s instructions for battery disconnection or battery-disable mode, where applicable.
- Use an appropriate static-safe work area and avoid touching connector contacts.
- Keep track of screw locations and reinstall shields, covers, pads, and brackets as documented.
- Do not force a drive, cable, or bottom cover into place.
- Confirm the SSD is detected before attempting an operating-system installation or recovery.
Stop and seek professional or manufacturer assistance if any of these apply:
- There is no official procedure for accessing the storage.
- The battery appears swollen, damaged, or difficult to disconnect safely.
- The connector, mounting point, or drive dimensions do not match the documentation.
- A required bracket, cable, screw, shield, or thermal component is missing.
- The laptop does not detect a correctly specified and correctly installed drive.
- The procedure requires steps you are not comfortable performing.
Frequently asked questions
Can I install an NVMe SSD in an M.2 slot that currently holds a SATA SSD?
Not necessarily. M.2 describes the physical module format, while SATA and NVMe use different storage interfaces. Check the official documentation for your exact laptop model to see whether that slot supports PCIe/NVMe storage, SATA storage, or both. Do not make the decision from the current drive’s shape or notch pattern alone.
How do I tell whether my laptop has a second SSD slot?
Check the official service manual, maintenance guide, or parts diagram for your exact model or serial-number-specific configuration. Look for a second storage connector and its required bracket or screw. An empty chassis area or a listing for a higher-spec version of the same laptop is not enough proof.
Does a PCIe Gen4 SSD work in a laptop with an older PCIe slot?
It may be possible in some systems, but it is not a universal guarantee. Check the laptop manufacturer’s storage specifications, supported drive types, physical-clearance requirements, and firmware guidance. A drive can fail to be a suitable upgrade for reasons beyond PCIe generation.
Do I need to clone my old SSD before replacing it?
No. You can clone the old drive or reinstall the operating system and restore your files. Cloning is useful when the required tools, enclosure, drive interface, encryption state, and storage capacity all align. A clean installation is often the safer option when cloning requirements are unclear. In either case, verify your backup before removing the original drive.
The practical rule: verify before you buy
The safest SSD upgrade starts with the laptop’s exact model documentation, not a generic compatibility label. Confirm that storage is removable, determine whether you are adding or replacing a drive, match the documented interface and dimensions, and prepare a backup and recovery plan before opening the chassis.
If any part of the chain is uncertain—especially the slot type, drive length, spare-slot status, or service procedure—do not treat a likely match as a confirmed one. Get clarification from the laptop manufacturer or an authorized service provider before purchasing the SSD.