How to Install a Second NVMe SSD in a Laptop Safely
Confirm a second M.2 slot, drive size, interface, cooling parts, and warranty before installing and initializing an NVMe SSD in Windows.
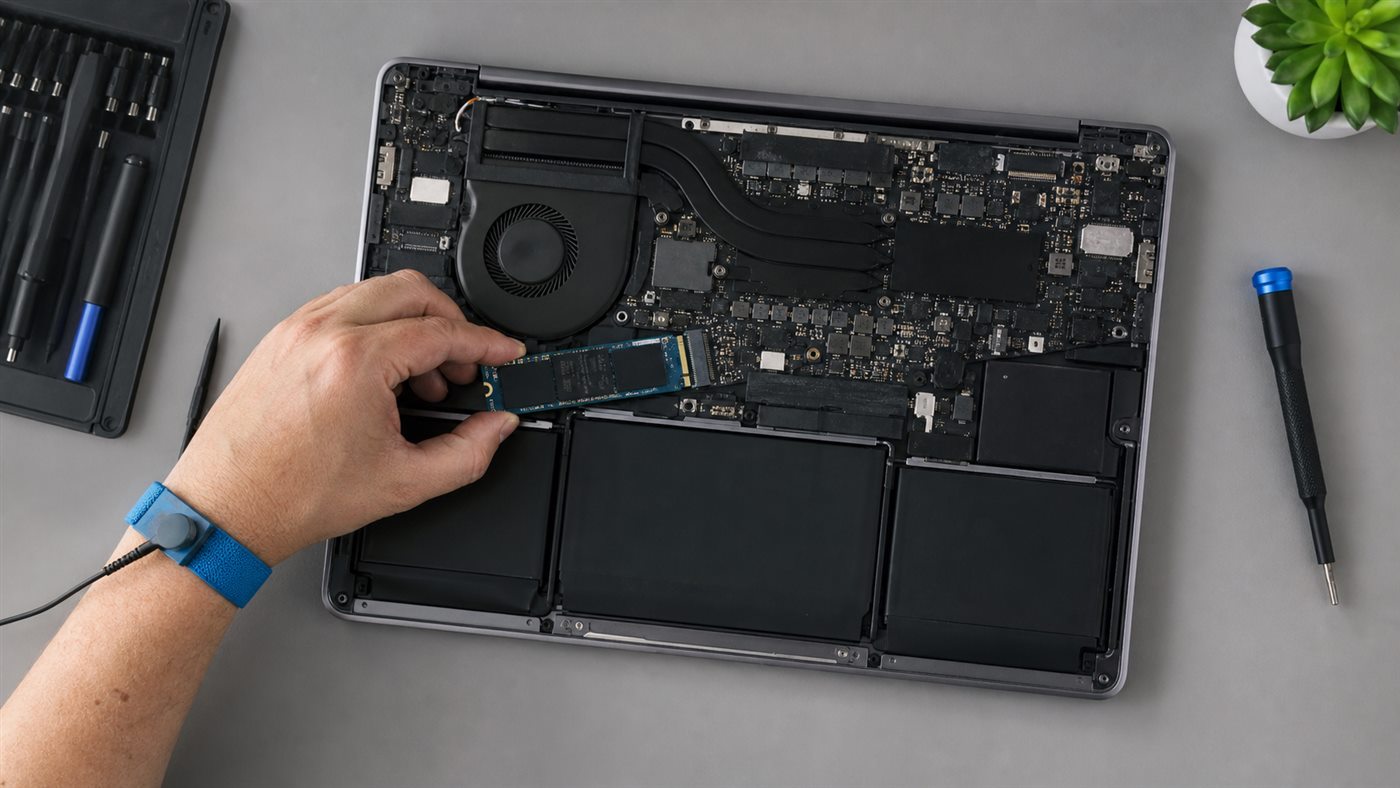
Installing a second NVMe SSD is straightforward only after compatibility is proven. An empty-looking M.2 connector may support a different device, drive length, PCIe generation, or no storage at all. The manufacturer service manual for the exact model and revision is authoritative.
Before opening the laptop
- Back up irreplaceable data and save the recovery key if device encryption is enabled.
- Confirm a second storage-capable M.2 slot and supported sizes such as 2230 or 2280.
- Confirm NVMe/PCIe support; M.2 describes the form factor, not the protocol.
- Obtain the specified retaining screw, bracket, shield, and thermal pad.
- Read warranty terms and the manual’s battery-disconnection procedure.
- Stop if the battery is swollen or the chassis is damaged.
Installation steps
- Shut down fully, disconnect power and accessories, and hold the power button only if the service manual instructs it.
- Work on a clean nonconductive surface. Use ESD precautions and the exact screwdriver bit.
- Remove the base cover in the manual’s order. Do not guess hidden screw or clip locations.
- Disconnect or disable the internal battery exactly as documented.
- Remove the M.2 shield or retaining screw if present. Preserve its position and thermal material.
- Align the drive notch, insert at the angle shown in the manual, then lower it without forcing it.
- Secure the drive and reinstall the specified thermal pad/shield. A pad placed incorrectly can prevent contact or bend the board.
- Reconnect the battery, inspect for loose tools or cables, and reinstall the cover in the documented order.
Normal installation should require light insertion pressure and leave the SSD flat when retained. Stop if the notch does not align, the drive bows, a connector lifts, or a screw will not engage.
Initialize and verify in Windows
Enter firmware setup only using the model’s official method and check whether the new drive appears. Do not change unrelated storage-controller modes. In Windows, right-click Start and open Disk Management. Microsoft’s Disk Management instructions explain how to bring a disk online, initialize it, and create a volume; GPT is the normal choice for a modern UEFI system.
Confirm you selected the new empty disk by model and capacity before initializing or formatting. Formatting an existing volume destroys data. After creating a volume, copy a noncritical file, read it back, restart, and check the drive again.
If the SSD is not detected
Power down and recheck seating, retaining hardware, slot compatibility, and battery connection. Update firmware only from the manufacturer and only when the release notes are relevant. Test the drive in another known-compatible system or enclosure if available. Restore the original configuration if the laptop no longer boots.
Seek professional help when the manual does not authorize the procedure, a connector or screw is damaged, the battery is unsafe, or data recovery is involved. For memory work, use the separate RAM upgrade guide; for buying storage capacity, see the budget laptop checklist.
Conclusion
Compatibility is the hard part. Once the exact slot, drive, retaining parts, and battery procedure are confirmed, install gently, verify firmware detection, and initialize only the identified new disk.
Frequently asked questions
Will a PCIe 4.0 SSD work in a PCIe 3.0 slot?
Often at the older link speed, but the laptop manual and drive documentation must confirm compatibility.
Do I need a heatsink?
Use only the shield, plate, or thermal pad specified for the laptop. Desktop heatsinks often do not fit notebook clearances.
Why does usable capacity look smaller than the label?
Manufacturers and operating systems report capacity with different units, and formatting consumes some space. A modest difference is normal.